

- Published on
Front-end tooling for dummies
- Authors
- Name
- Weder Ribas
- @wederribas


Before getting into front-end development I used to work mainly with PHP and Perl. My work was pretty much focused on writing back-end code that enabled batch processes to run. When I decided to get my feet wet in the front-end world, I did what (I guess) the majority of developers have done before: HTML + CSS + jQuery all the way.
It worked well for quite a while, but as the complexity of the applications I was working on increased, and the number of people working in the same codebase grew, it was becoming unsustainable to maintain a sane mind with all of it.
After some months of work and learning, I've finally got to understand that front-end development was a lot more complex than the simple workflow I was used to. In this post I'd like to get you in the same point I was when I realized that jQuery by itself wouldn't be the only tool I needed to know in order to build complex front-end apps.
This will be a series of posts where I'm building the most over-engineered Tic-Tac-Toe game ever, and this post is intended to build the foundations of this web app. In the upcoming posts, we'll dive into more complex stuff, including some back-end, Cloud deployments, and much more.
Pre-requisites: this post assumes you have some knowledge in HTML, CSS, and JavaScript. You don't need to be a master on it (otherwise it wouldn't be front-end tooling for dummies lol). I'll try to be as much clear as possible, assuming that you may not know about a specific term or technology. I don't like obscurity. It makes things harder to understand and using simpler language makes it easier for beginners to really understand something. If you still need to learn the basics about web development, I'd suggest you watch the introductory courses on freeCodeCamp, and come back to this post later.
I'll also use the Vue.js framework to build the UI components. Again, basic knowledge on it will suffice to catch up with this post. If you need to brush up your knowledge a little bit, Vue Mastery has a free course you can watch.
In this post...
As I've mentioned, we'll build the most over-engineered Tic-Tac-Toe game ever. In this post specifically, I want to start from the very beginning of modern front-end tooling. I'll gently introduce the history of JavaScript modules and how they evolved through time.
Later on, I'll touch base on Webpack, what it is and why we use it.
Then I'll start building the app skeleton, showing you how to configure a Vue app from scratch with Webpack. Notice that although we are using Vue.js here, most of the Webpack configurations I'll show will work for any UI framework.
Happy learning!
JavaScript in the early days
In the dark ages of web development, JavaScript was used as much as its name stands: as a script. Any JavaScript file would be executed top to bottom. Simple and clean. We would use JavaScript to add some dynamicity in static HTML pages. Life was simpler. 😅
Imagine you have a simple HTML file where you want to add some JS functionality. There are really two ways you can add this code to the browser:
<html>
  <body>
    <!-- You either insert your code directly in a script tag... -->
    <script>
      function add(a, b) {
        return a + b
      }

      console.log('Add 1 + 2', add(1, 2))
    </script>

    <!-- Or you reference a JavaScript file as the source -->
    <script src="./script.js"></script>
  </body>
</html>
Both approaches are totally fine if you are building a very simple app, or if you are prototyping something very quick. Now imagine that you want to build something more complex, let's say, an e-commerce website. Now you have dozens of developers working in the same project, thousands of packages that you'll need to import into your app. Would that be sustainable to keep referencing all of them in the index.html file?
At this point you'll face several problems:
- This approach is too hard to manage. You'll end up with a lot of conflicts in your version control system (when multiple developers modify the same line in the same file, at the same time). How do you keep track of your project's dependencies? Too hard;
- Everything is in the same scope. All variables and functions are now global and accessible everywhere. Think of scope as the context that your code runs into. It makes variables declared in the same scope (context) accessible to other functions/statements/variables. You run into the risk of variables being overridden, values are changed unintentionally, and boom! Everything is broken;
- Performance is now dead. You'll have big scripts that do too much. The browser will need to interpret all this JS code before letting your users interact with your app. Imagine a user in a low-end mobile phone connected to a slow 3G network. They will give up on using your app before it finishes loading;
- It simply doesn't scale. It's almost impracticable to read giant files (I've worked in a project where a single file had 10K lines, it's a nightmare). Readability is also dead.
A partial solution to the scope problem
In the attempt to go around the scoping issue, developers would separate code in different files and surround this code in an IIFE (Immediately Invoked Function Expression). Take this example:
// userName is in the 'global' scope.
var userName = 'Weder'

// That's an IIFE. A function or expression surrounded
// by parenthesis and immediately invoked by adding () to its end
var userInfo = (function (userData) {
  // this variable won't collide with the outside one
  // once it's scoped by the IIFE
  var userName = userData.name

  return {
    name: userName,
  }
})({ name: 'Claudia' })

console.log(userInfo.name)
// Output: 'Claudia'

console.log(userName)
// Output: 'Weder'
// YaY the `userName` variable from line 2 wasn't affected by
// the one declared at line 6.
This is really cool. IIFE's are kinda magical and they are the base of some modern bundlers we use in production today (e.g. webpack, don't worry, there is a section just for that). But we still have problems.
First, if we have 100 different files, each one with its own IIFE, and we shove them into a single bundle (a single script that references the other 100 ones), we are just concatenating files and forcing the browser to eager parse all of our code before even loading our page.
Imagine a simple landing page, where you have a footer that is only visible after five complete page scrolls on mobile. Imagine that this footer has some JavaScript code that adds some functionality to it. If a user loads your page they will need to wait until the browser parses the footer code before being able to interact with your page. They may never get to the footer, but they paid the cost of downloading and running this code without never making use of it. It doesn't sound good.
JavaScript modules
Node and CommonJS
Let's get away from strict web apps development and get into Node.js a little bit. In 2009 Node.js came out, bringing JavaScript to the server-side. But, here's an interesting question: how do you load a JavaScript file in the server where the DOM (Document Object Model), which provides the <script> tag API, does not exist?
Enters CommonJS, a module format that enables you to includes other JavaScript files into your base script by requiring them. If you ever used Node.js you may be familiar with this:
const sendMessage = require('./messageSender.js')
const message = 'This is a Node.js APP!'

sendMessage(message)
Now you can simply add scripts to one another without worrying about scope getting leaked among them. Sweet.
Alongside with Node and CommonJS, npm (Node Package Manager) was also born. Think of npm as a registry (a remote server) where you can publish your JavaScript packages to, and get packages created by other developers as well. At this point of history, JavaScript had the ecosystem that it was missing for years.
However, there is still a problem. You cannot user CommonJS in the browser. There is no support for it. All packages you've developed in Node cannot be simply required in the browser. All packages on npm are simply not available to the browser.
In an attempt to solve this some bundlers started to appear. Things like Browserify were created, allowing you to convert your CommonJS code to something that a browser could understand and execute. It's fine, but we still have issues in this approach. You cannot lazy load some packages, which gets back to that footer example I gave earlier. You just ship a giant bundle of code, even if your app doesn't need it all upfront.
ESM - ECMAScript Modules
In mid-2015, after quite a lot of time in the oven (about 10 years), the ES Modules specification is released. It brings a standardized approach to code and loads JavaScript modules to the browser. You've may already seen this syntax somewhere:
import { division } from './math.js'
import * as math from './math.js'

export const afterAddition = math.add(1, 2)
const afterDivision = division(afterAddition, 2)

export default afterDivision
Now you can use import/export statements to share and use packages. It's sweet! Notice that we have two types of imports/exports: default and named ones.
In default import/exports you don't need to give a name to what you are importing/exporting. Notice that in the snippet above, on line 2, I just import all the exported functions/variables from math.js without worrying about their names. I basically shove all of them in an object that I named math. I could name it deadpool if I wanted to.
Named imports/exports allow you to specifically import exactly what you want from a package, or just export things you want to expose from your package. That's pretty cool.
Finally, we have modularity in place for the browser. You can strip your code in reusable packages that are encapsulated (no scope leaking). You'll be able to organize your code in a more straightforward way, allowing other developers to understand your codebase with less effort.
However, we still have some problems. Yeah, life is not so simple in the web development world. You still can't just build your entire website with just ES Modules. You'll still need to use some packages from npm which are shipped as CommonJS modules. Also, ES Modules are not fully supported by Node (it's an experimental feature at the time I'm writing this article, not recommended for production usage). Therefore, there is no interoperability between packages created for the web and packages created for Node.
Additionally, not all packages inside npm are built in the same way. Some use ES Modules, a lot of them use CommonJS (or even AMD modules). So how do you build a consistent app if you need to manage multiple ways to use external packages? Enters Webpack.
Webpack
The original Webpack docs say:
At its core, webpack is a static module bundler for modern JavaScript applications. When webpack processes your application, it internally builds a dependency graph which maps every module your project needs and generates one or more bundles.
webpack lets you write modules in any format and finally compile your modules (and its dependencies) to be used in the browser. Let's go a bit deeper.
Let's say you wrote a new JavaScript module called network. Its purpose is to make HTTP requests over the network and communicate with other APIs. You intend to use this module in both Node and in the browser, once your "imaginary app" uses Node in the back-end and inevitably uses JavaScript in the browser. Now you have a dilemma: you need to write this package in CommonJS, once at this moment, that's the best approach to use your lib in Node. But the browser won't support it.
Wouldn't it be nice if you could simply use something that would bundle your module when used in the code, in a way that the browser would understand? That's exactly what Webpack does.
Fun fact: Webpack uses IIFE's under the hood to provide you the same experience using modules in the browser as you'd have by using the same module on Node.
P.S.: there are other bundlers in the market. Parcel is one example. I choose the stick with webpack due to its customizability, good documentation, and a vast array of features (e.g. code splitting, static assets management, etc.) and especially because it's the one I use at work. 😅
Too much talking, let's code
We're going to start from the very beginning. Again, this is an article for developers who are getting started on front-end tooling, so I want to be as clear as possible.
If you prefer, you can clone this project from GitHub directly. Or, you can code along with me as I explain each topic. The code for this post is contained in the branch 01-webpack-fundamentals.
Let's start
To organize the project, create a tic-tac-toe folder and within this folder let's create an index.html file.
$ mkdir tic-tac-toe && cd tic-tac-toe
$ touch index.html
Then, inside the index.html file add the following content. Very simple, not fancy here.
<!DOCTYPE html>
<html lang="en">
  <head>
    <meta charset="UTF-8" />
    <meta name="viewport" content="width=device-width, initial-scale=1.0" />
    <meta
      name="description"
      content="Welcome to the world's most over-engineered tic-tac-toe game"
    />
    <title>Tic Tac Toe</title>
  </head>
  <body>
    <div class="app"></div>
  </body>
</html>
Now that we have a basic HTML page, let's add Vue to it. We'll use Vue here to allow us to build isolated components that will be used to compose our app. Without using any additional tooling, we can build a Vue app by simply adding it as a dependency and creating a new Vue instance:
<html>
  <head>
    <meta charset="UTF-8" />
    <meta name="viewport" content="width=device-width, initial-scale=1.0" />
    <meta
      name="description"
      content="Welcome to the world's most over-engineered tic-tac-toe game"
    />
    <title>Tic Tac Toe</title>
    <script src="https://cdn.jsdelivr.net/npm/vue/dist/vue.js"></script>
  </head>
  <body>
    <div class="app">
      <h1>Tic Tac Toe</h1>
      <p>{{ message }}</p>
    </div>
    <script>
      // It creates the new Vue instance and
      // targets the `div` with class `.app` as the mount point
      new Vue({
        el: '.app',
        data: {
          message: `Welcome to the world's most over-engineered tic-tac-toe game`,
        },
      })
    </script>
  </body>
</html>

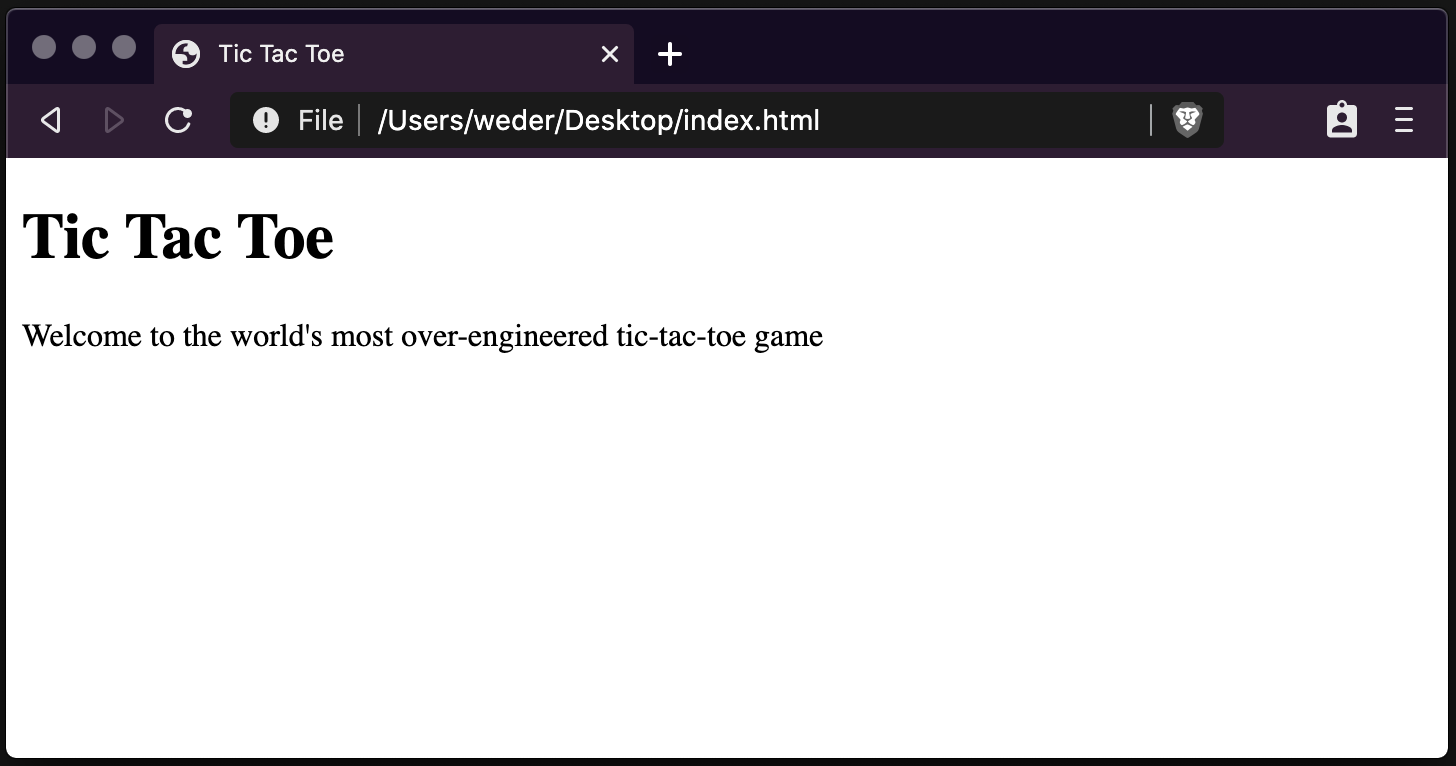
Coool! Now we have a working Vue app. Our message was correctly hooked up to the paragraph in the HTML page. We could start building components now, but there is something to consider.
By using Vue directly inside the script tag, and creating new components with Vue.component, our app would become too complex to manage very soon. The tic-tac-toe app is now very simple and it in fact doesn't need a UI framework. However, we plan to build a more complex app down the road. Using a UI framework will help us in the future.
So, wouldn't it be good if we could have components isolated as modules (remember? JavaScript Modules? 😆) and import them as needed?
Luckily Vue implements something called Single File Components. Think of them as CommonJS modules that contain your HTML template, supports your styling via CSS, and holds all business logic that these components should have with JavaScript. That's awesome!
Let's convert our simple Vue instance to a single file component. Create a new folder called src with the App.vue file:
<template>
  <div class="container">
    <h1>Tic Tac Toe</h1>
    <p>{{ message }}</p>
  </div>
</template>

<script>
  export default {
    name: 'App',
    data() {
      return {
        message: `Welcome to the world's most over-engineered tic-tac-toe game`,
      }
    },
  }
</script>

<style>
  * {
    box-sizing: border-box;
  }

  html {
    font-size: 16px;
    font-family: 'Segoe UI', Tahoma, Geneva, Verdana, sans-serif;
  }

  body {
    margin: 0;
  }

  .main {
    padding: 20px;
  }
</style>
That's it. Vue single-file components look like a lot with a plain HTML file, but they are super powerful. Now we need to hook it up with our index.html file, that for now is the "entry point" of our app. However, we cannot simply do this in our index.html file:
<!-- This does not work -->
<script src="./App.vue"></script>
The reason is pretty simple: the browser doesn't know how to parse a .vue file. Here is the point where the front-end tooling party starts. We need a way to compile this Vue component (that's basically a module) to plain JavaScript, which is something that browsers are good at parsing and executing. Let's talk about webpack loaders.
Webpack loaders
Webpack is not a polyglot fella. Out of the box it only understands JavaScript. In this way, if we want webpack to process our newly created Vue single-file component, we need to first transform it into something that webpack understands: JavaScript modules.
When webpack is processing your code, it creates a dependency graph (starting from an entry point), traversing all the files until no dependencies are left.
Let's assume you've organized your code like this:
app.js
  |
  | math.js
      |
      | division.js
      | sum.js
      | sqrt.js
          |
          | sqrt-lib.js
Here, app.js requires (or import) math.js, which import three other modules (division, sum, and sqrt). And sqrt.js has an external dependency with another library called sqrt-lib.js. What webpack will do is, starting from app.js, start reading each file and taking note of each module this file depends on. It does it by checking statements like require, import or define (AMD Modules).
Our example is trivial. All files are simply written in JavaScript. Webpack knows what to do. But now, let's assume that the sqrt-lib is written in TypeScript. Webpack will throw errors because it doesn't know how to read it.
Luckily, webpack supports the use of loaders, which are simply JavaScript functions that run against a specific file, translating this file from whatever it is (Vue, TypeScript, CSS, etc.) into a JavaScript module.
Installing webpack and vue-loader
In order to use webpack, we need to initialize our own JavaScript module by using yarn (or npm) to create a package.json file. This file will manage all dependencies and also hold the support scripts we need.
Initialize a project by simply running $ yarn init -y in your terminal. This will create the package.json file. Now let's add the dependencies:
# Add Vue as a project dependency
$ yarn add vue

# webpack-cli provides the support to use webpack
# via the command line interface.
$ yarn add webpack webpack-cli -D

# Add webpack and vue-loader as development dependencies
# We also added vue-template-compiler, and style loaders
$ yarn vue-loader vue-template-compiler vue-style-loader css-loader -D
In the package.json you'll notice we now have the dependencies and devDependencies keys. They will help us keep track of the modules this project depends on to run.
Adding the webpack vue-loader
First of all, let's create a Javascript entry point to our app. Webpack will use this file as the first node of the dependency graph. Create a new file into the src folder:
import Vue from 'vue'
import App from './App.vue'

// Simply create a new Vue instance and mount (attach) it
// to a DOM node. In this case, our div with .app class.
new Vue({
  render: (h) => h(App),
}).$mount('.app')
Now let's create a webpack config file. This file is the place where we tell webpack how to behave. We'll use it a lot throughout the app dev journey. For now let's just tell webpack where is our app entry point, and which loader to run when processing .vue files. Create a new file called webpack.config.js in the project's root folder:
module.exports = {
  // Defines the app entry point.
  // We just tell webpack where to start traversing.
  entry: {
    app: './src/main.js',
  },
  // We can have as many rules as needed.
  // The rules define which loaders should run
  // when a file extension is found.
  module: {
    rules: [
      {
        // Here we tell webpack that any file ending
        // with .vue should be processed with the vue-loader.
        test: /\.vue$/,
        loader: 'vue-loader',
      },
      // Same concept here. But now we use two loaders.
      // These loaders will process the CSS <style> tag
      // we have in our .vue component. It also append this
      // CSS in our index.html file.
      {
        test: /\.css$/,
        use: ['vue-style-loader', 'css-loader'],
      },
    ],
  },
  // We haven't talked about plugins yet, but we need this
  // one to be used alongside vue-loader. More info in the
  // next topic.
  plugins: [new VueLoaderPlugin()],
}
As you may have noticed, the webpack config file itself is a JavaScript module. Neat.
Running webpack
Cool, now we have our webpack configuration ready. We then need to run webpack to get our bundled code. Let's now add a script into package.json that allow us to run the webpack compiler:
{
  "name": "tic-tac-toe",
  "version": "0.0.1",
  "description": "The world's most over-engineered tic-tac-toe game",
  "main": "main.js",
  "scripts": {
    "bundle": "webpack --config webpack.config.js"
  },
  "keywords": ["javascript"],
  "author": "Weder Ribas @wederribas",
  "license": "MIT",
  "devDependencies": {
    "clean-webpack-plugin": "^3.0.0",
    "css-loader": "^3.6.0",
    "html-webpack-plugin": "^4.2.0",
    "vue-loader": "^15.9.2",
    "vue-style-loader": "^4.1.2",
    "vue-template-compiler": "^2.6.11",
    "webpack": "^4.43.0",
    "webpack-cli": "^3.3.11"
  },
  "dependencies": {
    "vue": "^2.6.11"
  }
}
Now, in your terminal, run $ yarn bundle to trigger the webpack compilation. If everything goes well you should see something similar to the following output:

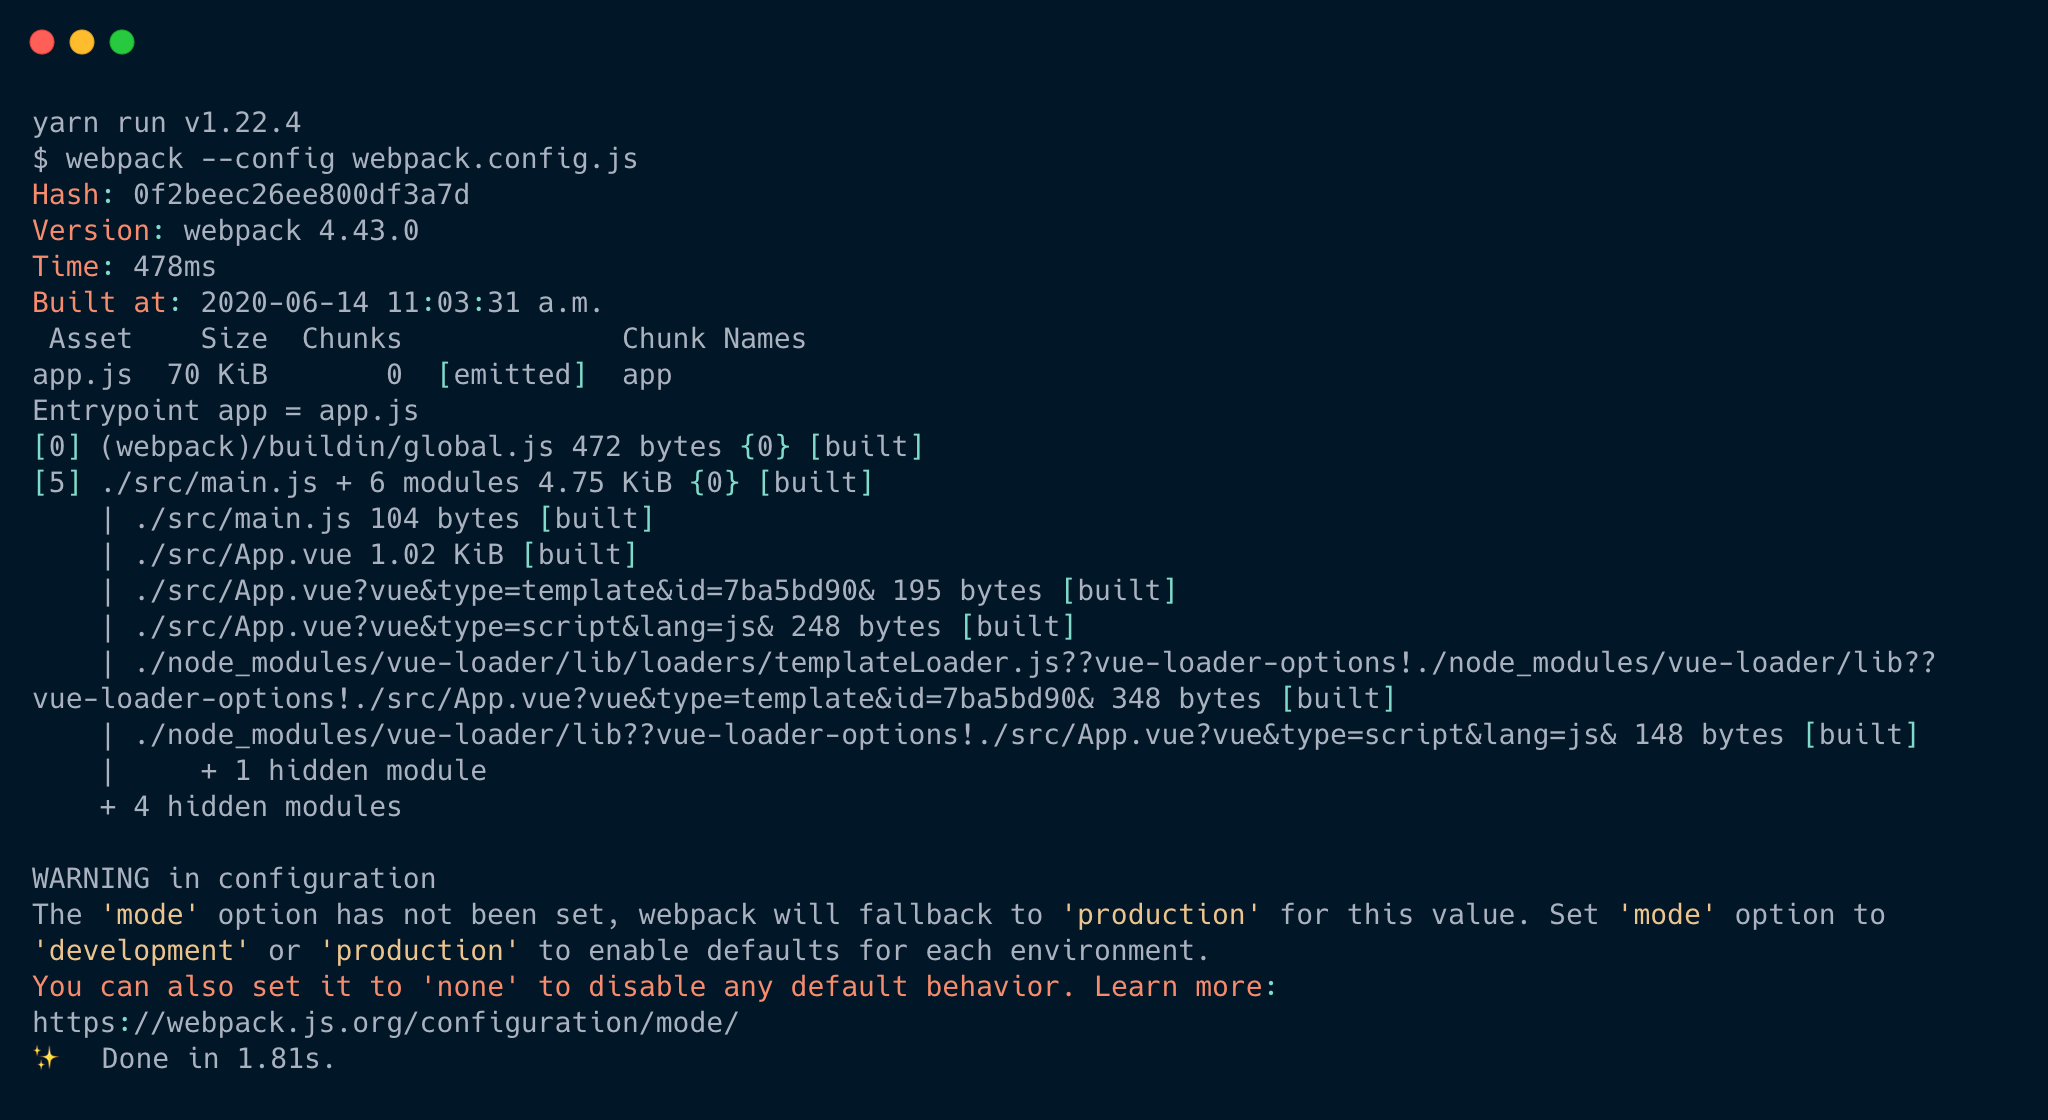
Don't worry if you don't fully understand what the output means. If you read it carefully you'll notice that webpack identified the entry point we've set up (app.js) and started traversing its dependencies to build the final bundle. See that warning at the bottom? So far we didn't set up the webpack mode. It did fallback to production by default. But what does it mean?
The webpack mode tells webpack if it should apply the built-in optimizations when compiling. When on production mode, webpack will automatically minify your code (reduce its size by removing white spaces, comments and everything that's not essential), it will set the environment env NODE_ENV to production and apply more optimizations.
On development mode, webpack will focus on enhancing the developer experience by enabling plugins that help you with development and debugging.
Running our bundle!
Once the compilation is done, webpack will output the compiled bundle to the filesystem. We didn't tell webpack where we wanted to have the output saved, therefore the default option was used. You should now see that a dist folder in the project's root folder.
Inside this folder, we have the app.js file. This is our compiled bundle! Cool, now let's now use this bundle in our index.html file. First, we remove all existing Vue code from it (it's now contained on App.vue), and just add the bundle to a script tag.
<html>
  <head>
    <meta charset="UTF-8" />
    <meta name="viewport" content="width=device-width, initial-scale=1.0" />
    <meta
      name="description"
      content="Welcome to the world's most over-engineered tic-tac-toe game"
    />
    <title>Tic Tac Toe</title>
  </head>
  <body>
    <div class="app"></div>
    <script src="./dist/app.js"></script>
  </body>
</html>
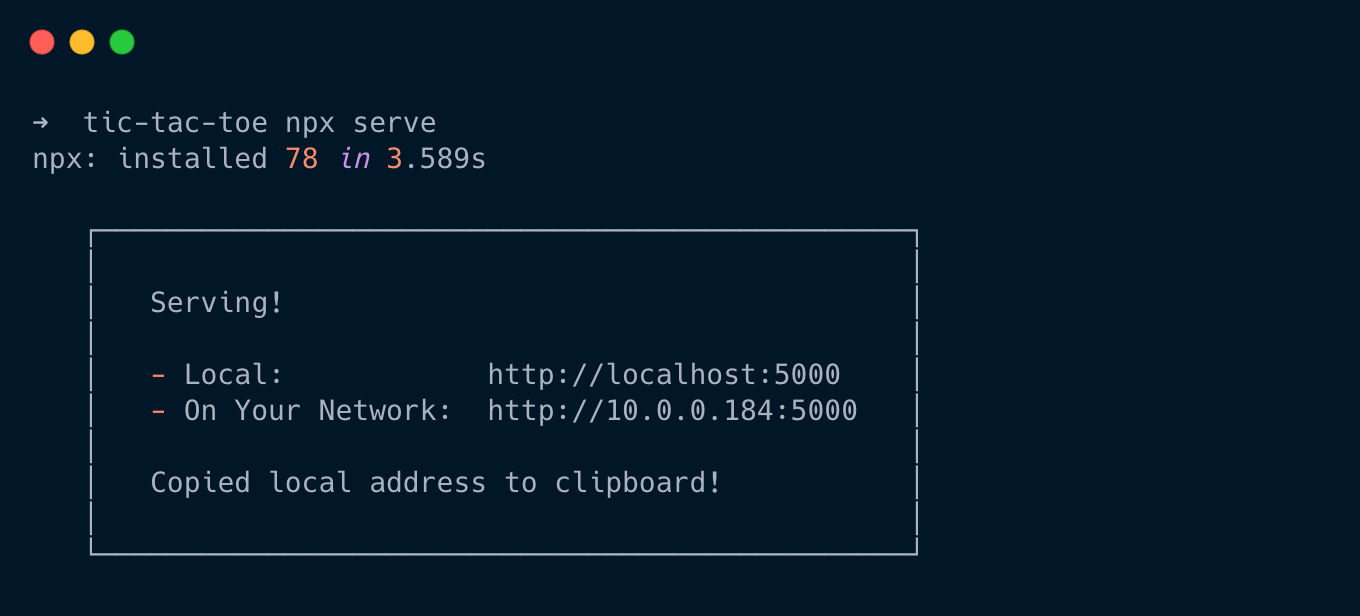
Finally, let's see the result on the browser. We'll use a simple web server to serve our small app. In the project's root folder run:
# Install a simple HTTP server globally
$ yarn global add serve

# Execute the server with npx at the current folder
# and listening on port 5000
$ npx serve -l 5000
All set, now the development server is running at http://localhost:5000.


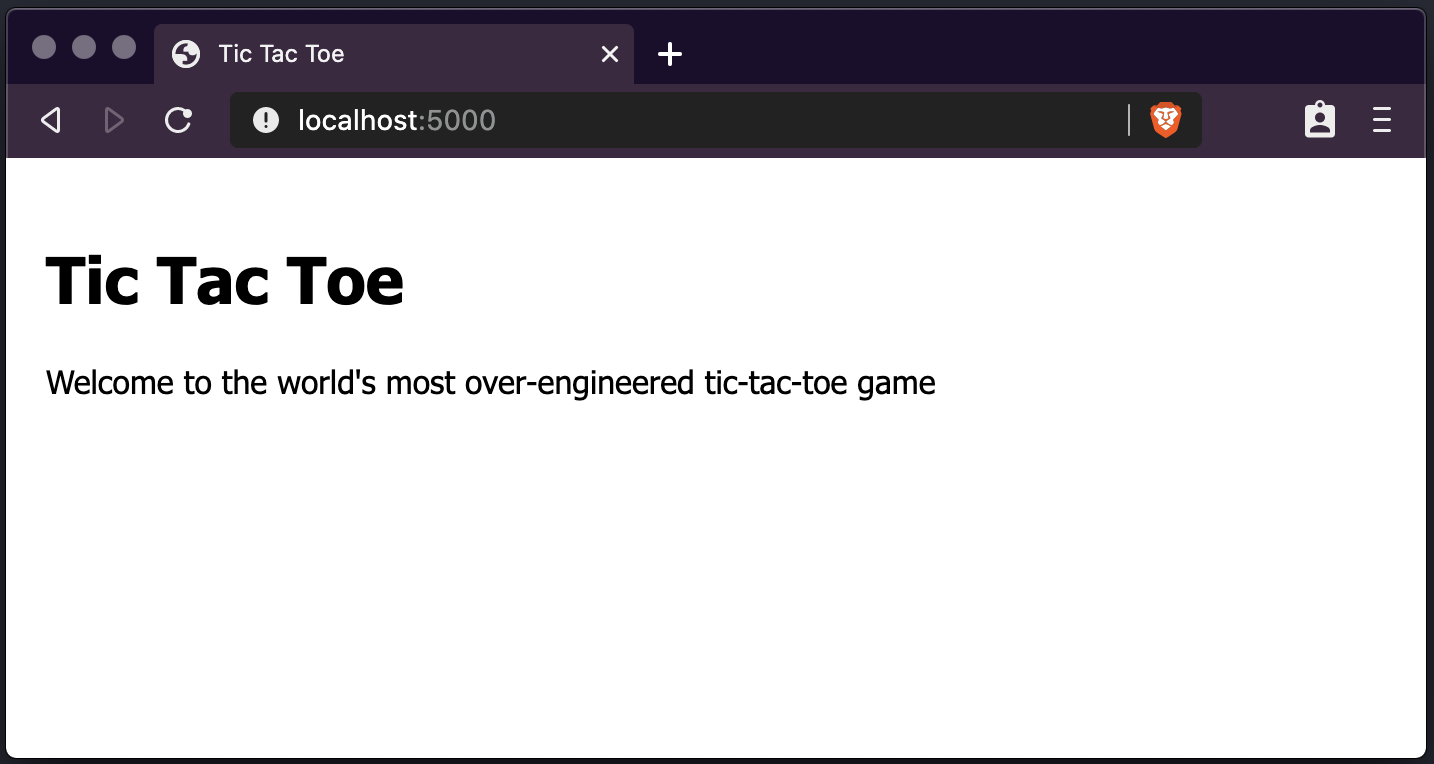
That's nice! We've just integrated HTML + Vue + Webpack. This is almost a production-ready app at this point. Of course, it's far from optimal. The development experience is not very good yet, if we run into bugs, using webpack production mode while developing wouldn't help. There are additional steps to make this app shine!
Webpack plugins
Up until this point we've introduced webpack and how to use loaders with it. But there is a lot more webpack can do.
To extend webpack capabilities we can use plugins. They allow you to hook into the webpack compilation lifecycle and apply modifications or perform side-effects. You may be wondering why we have loaders and plugins? Don't they do the same thing?
Well, not quite. Loaders are applied per-file basis. Remember: we match file extensions to tell webpack what to do when it encounters a file with a certain extension. Plugins can interact with your entire bundle, applying changes that go above single files only. They are aware of the whole bundle context.
Webpack itself is composed of tons of plugins and it's one of the nice parts of webpack. It's highly customizable (you can write your own plugin in minutes) and allows you to adapt it to your own use case.
Let's add some plugins to our project, getting it closer to a production-ready web app.
html-webpack-plugin
We've been using index.html as our main file, where the webpack bundle is hooked up to. So far it's just fine, our bundle has the same name and is saved to the same location on every compilation:
<script src="./dist/app.js"></script>
However, in the future, we'll use more advanced webpack settings that will allow our web app to work with caching. At this point, every time we compile the app, the bundle will have a new name (hash added to the bundle's name). It would be just too painful to keep changing the index.html file each time we create a new bundle version.
To help us with that we can use the html-webpack-plugin. It allows us to use a template HTML file that will serve our webpack bundles. The template is optional, but we want to have more control over it, therefore we provide our own.
The magic trick here is: during each bundle compilation, this plugin will get our template and apply the newly generated bundle to it, with the correct bundle name. Easy peasy. Let's do it.
On your terminal run:
yarn add html-webpack-plugin -D
Let's move our index.html file to a separate folder, just for better code organization:
# This folder will contain some generic files
$ mkdir public
# Move it
$ mv index.html public/
Now, in our webpack config, let's add the new plugin and also tell webpack to use a hash in the bundle file name to allow us to have unique bundle names on every compilation:
const VueLoaderPlugin = require('vue-loader/lib/plugin')
const HtmlWebpackPlugin = require('html-webpack-plugin')

module.exports = {
  entry: {
    app: './src/main.js',
  },
  // Instructs webpack to include a chunkhash in the bundle's name
  // It will further allow us to invalidate the app's cache
  // when a new version is deployed
  output: {
    filename: '[name].[chunkhash].bundle.js'
  }
  module: {
    rules: [
      {
        test: /\.vue$/,
        loader: 'vue-loader',
      },
    ],
  },
  plugins: [
    new VueLoaderPlugin(),
    new HtmlWebpackPlugin({
      template: './public/index.html',
    }),
  ]
Cool, we're all set. Let's run webpack once again and check its result:
$ yarn bundle
You should now see something like this:

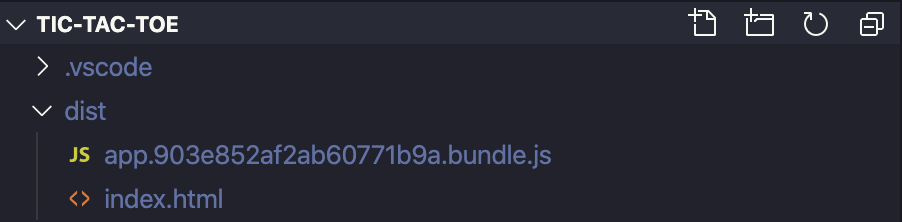
Notice how webpack created the bundle with a unique hash AND also created a new index.html file inside our dist folder, using the html-webpack-plugin. This file should now be referencing the new bundle:
<!DOCTYPE html>
<html lang="en">
  <head>
    <meta charset="UTF-8" />
    <meta name="viewport" content="width=device-width,initial-scale=1" />
    <meta
      name="description"
      content="Welcome to the world's most over-engineered tic-tac-toe game"
    />
    <title>Tic Tac Toe</title>
  </head>
  <body>
    <div class="app"></div>
    <script src="/app.903e852af2ab60771b9a.bundle.js"></script>
  </body>
</html>
P.S.: now that we have a new index.html with the correct bundle, we'll need to update our serve command as well:
$ npx serve dist -l 5000
copy-webpack-plugin
Now that webpack assigns a new name to our bundle on every compilation, we have a secondary problem. After some time of development, where we've run $ yarn bundle quite a lot of times, our dist folder would be bloated with old bundles:

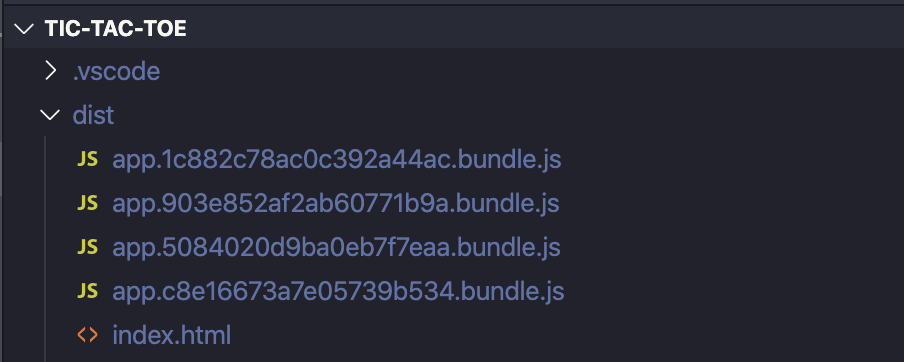
I hate doing manual work, I guess you too. Luckily we don't need to re-invent the wheel. The clean-webpack-plugin is the solution here. We just need to add it as a dev dependency to our project and include it in our webpack conf.
$ yarn add clean-webpack-plugin -D
const VueLoaderPlugin = require('vue-loader/lib/plugin')
const HtmlWebpackPlugin = require('html-webpack-plugin')
const { CleanWebpackPlugin } = require('clean-webpack-plugin')

module.exports = {
  entry: {
    app: './src/main.js',
  },
  output: {
    filename: '[name].[chunkhash].bundle.js'
  }
  module: {
    rules: [
      {
        test: /\.vue$/,
        loader: 'vue-loader',
      },
    ],
  },
  plugins: [
    new VueLoaderPlugin(),
    new HtmlWebpackPlugin({
      template: './public/index.html',
    }),
    new CleanWebpackPlugin(),
  ]
Run the $ yarn bundle script one more time and... voilà. Now our dist folder will only contain the most recent generated bundle, saving you some storage space.


vue-loader-plugin
We kinda already saw this one. It was previously added to our project when we started using the vue-loader. I just want to explain what it does, with the official line from vue-loader's docs:
It is responsible for cloning any other rules you have defined and applying them to the corresponding language blocks in .vue files. For example, if you have a rule matching /.js$/, it will be applied to script blocks in .vue files.
Wrap up and next steps
WoW! You've made it! We know have a modern web application setup with a build system in place. We're now ready to dig a bit deeper into front-end tooling. Yes, there is a lot more we can do to:
- Improve production performance;
- Enhance development experience (we don't want to keep bundling every time we update the code);
- Organize our webpack configuration for production and local development;
- Add Babel support to support cutting edge JavaScript syntax;
- And more advanced webpack stuff: lazy loading, code splitting, tree shaking, etc.
Don't worry, my next post is coming up very soon and we'll continue with the journey of building the world's most over-engineered Tic-Tac-Toe game ever.
Cover photo by @jeshoots.